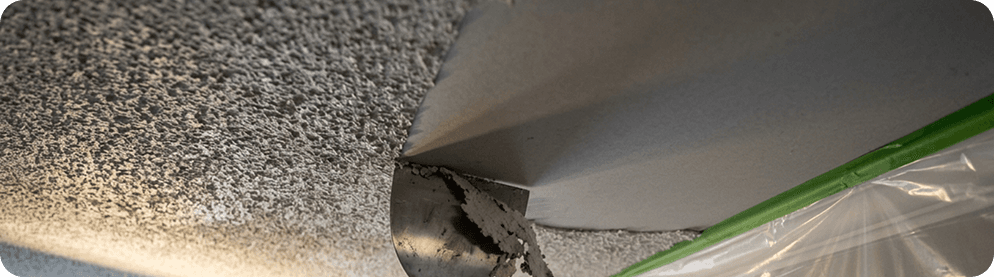
That outdated popcorn ceiling is the first thing you notice when you walk into the room. You have watched enough renovation videos to know the drill: grab a scraper, spray some water, and start scraping. It looks like a satisfying Saturday project that will instantly modernize your space.
But when it comes to removing popcorn ceilings, there is a massive difference between a surface that looks scraped smooth and one that is actually ready for a flawless paint finish.
Before you climb up the ladder with a scraper in hand, it is important to understand why popcorn removal is about halfway through the job not the finish line and why cutting corners creates expensive problems later.
1. The hidden mess factor
Most homeowners underestimate the sheer volume of debris created by popcorn removal. A single room's ceiling generates dozens of gallons of textured material that falls onto walls, floors, and everything in between.
- The DIY reality: you spread drop cloths on the floor, scrape away, and spend weeks finding popcorn grit in unexpected places: light fixtures, HVAC registers, inside closets, and tracked throughout the house. The fine dust settles everywhere and requires professional cleaning to fully remove.
- The professional alternative: an experienced team creates a contained environment with plastic barriers, specialized dust collection equipment, and methodical scraping that minimizes airborne particles. They protect your floors, walls, and belongings while keeping the mess contained to the work zone.
2. The bonding problem: when popcorn refuses to let go
Not all popcorn ceilings were created equal. Some were applied over primed drywall, others directly over raw paper-facing, and still others over existing paint layers. The original application method dramatically affects how difficult removal will be.
If the popcorn bonds too tightly to the substrate, aggressive scraping can:
- Tear the facing paper off drywall, requiring skim coating.
- Delaminate underlying paint layers.
- Create gouges and damage that need extensive patching.
- Release asbestos fibers in homes built before 1990.
Professional popcorn removers test small areas first, adjust their technique based on what they find, and know when mechanical removal needs to give way to skim coating strategies.
3. The smooth finish challenge
Many DIYers assume that once the popcorn is gone, they are ready to paint. But the newly exposed surface often reveals a patchwork of problems that professional contractors anticipate and address. The underlying drywall may have uneven joints, visible seams, gouges from aggressive scraping, or areas where the paper facing delaminated during removal. Professional popcorn removal transforms this rough canvas into a flawless surface through strategic skim coating, precise taping of problem areas, and systematic sanding that creates the perfect foundation for paint. They understand that achieving a truly smooth ceiling requires addressing what is revealed beneath the texture, not just removing what is on top.
4. The timing trap
Many DIYers scrape their ceilings and immediately paint, assuming the rough texture is "character." Within months, they notice:
- Imperfections becoming visible at certain angles.
- Patches where compound was applied but not feathered properly.
- Texture differences between original and repaired areas.
- Shadow and highlight issues that draw the eye to ceiling flaws.
Professional ceiling transformation follows a specific sequence: scrape, repair, skim coat (if needed), sand thoroughly, prime with a dedicated ceiling primer, then apply quality ceiling paint. Skipping any step creates problems that compound over time.
The anatomy of a lasting finish
A flawless cabinet transformation is 80% prep work and 20% application. Missing just one step ruins the entire project:
- Deep degreasing: removing invisible cooking oils so the paint can bond.
- Precision sanding & profiling: creating a mechanical grip on the original wood or laminate.
- Flawless priming: applying specialized stain blocking primers to prevent wood tannins from bleeding through.
- Flawless spraying: applying multiple micro layers of industrial coatings in a dust-free environment.
Skip these steps, and you are sealing water intrusion problems behind fresh paint, leading to rot, mold, and structural damage.
The verdict: a ceiling that adds value
When you look at the true cost of ceiling flattening, you are not just accounting for scraping time. You must consider the dust containment, specialized equipment, repair materials, skim coating expertise, and the reality that a halfway done ceiling actually hurts your home's value.
Investing in professional popcorn removal and ceiling refinishing delivers a smooth, modern ceiling that becomes an asset rather than an eyesore. It transforms your space, increases perceived room height, and creates a clean backdrop that showcases the rest of your interior design.